 gbClipper
 gbClipper is an easy to use freeware application for maintaining a history of the text content a user
places onto the clipoard. Once started, gbClipper works in the background to automatically detect and capture
new clipboard text content. By default, bClipper displays a list of all items that have been captured. The
user can modify how the list is presented (such as single or multi-line items) and can take actions on individual
items (such as copying the items to the clipboard). gbClipper can also be placed in the system tray.
gbClipper is an easy to use freeware application for maintaining a history of the text content a user
places onto the clipoard. Once started, gbClipper works in the background to automatically detect and capture
new clipboard text content. By default, bClipper displays a list of all items that have been captured. The
user can modify how the list is presented (such as single or multi-line items) and can take actions on individual
items (such as copying the items to the clipboard). gbClipper can also be placed in the system tray.
|
|
gbClipper uses a single main screen, consisting of two buttons - one to open the history file and one to open online help - and a label showing when the last clipboard change took place.
Additionally, a context menu of additional options and features is available.
Really, that's it. Once gbClipper starts running there's nothing more for you to do. As items are placed on the clipboard by other application, the text content will appear in gbClipper.
At any time you can optionally look at the history file, re-copy a history item to the clipboard, or take other actions with the history items.
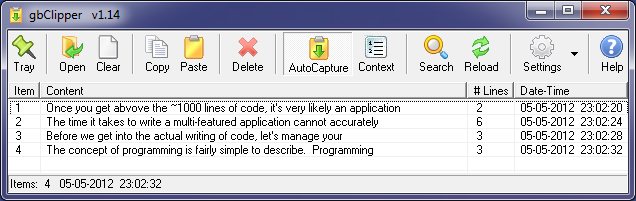
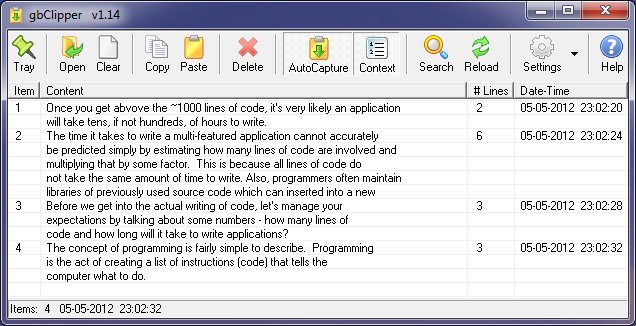
The gbClipper statusbar always shows the total number of items in the history file, and the date/time of the most recent addition.
Here's an image of gbClipper, with context lines showing.
These four toolbar buttons represent the most frequently changed/used gbClipper features - minimizing the gbClipper footprint while continuing to show the most useful toolbar buttons.
You can also double-click on the caption bar to toggle between normal and minimode display. The exception is that double-clicking on the cpation when gbClipper is maximized will simply restore gbClipper to its pre-maximized window size.
 gbClipper can be sent to the system tray by pressing the Tray button on the toolbar.
It will stay in the system tray, including the next session, until the setting is
changed.
gbClipper can be sent to the system tray by pressing the Tray button on the toolbar.
It will stay in the system tray, including the next session, until the setting is
changed.
When in the system tray, double-click on the gbClipper icon to restore the application.
When in the system tray, you can also right-mouse click on the gbClipper icon to get a context menu, which is exactly the same menu as the DropDown Menu discussed in the next section.
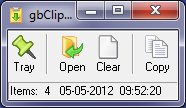
Here's an image of what gbClipper may look like when in the system tray. gbClipper is the first icon to the left in this image.

On some PCs, the system tray may have no room in the system tray, the portion along the base of the screen, so the gbClipper icon may be found in the hidden icon section of the tray.

The following options are available on the toolbar.
Tray
Sends gbClipper to the system tray.
Open
Opens a copy of the history file. While the file is open, gbClipper can continue
to receive clipboard content.
Clear
Clears all items from the history file.
Copy
Copy selected history item to clipboard. If checkboxes are displayed, then copies
checked history items to clipbboard.
Paste
Adds clipboard content to the history file. This is typically used when the
AutoCapture setting is off.
Delete
Remove the selected history item. If checkboxes are displayed, then deletes checked
history items.
AutoCapture
Causes gbClipper to work in the background, detecting when the clipboard content
is changed. When changse are found, the new content is added to the history file,
along with the date-time of the change.
Context
Shows the first few lines of the history item. The number of
lines shown is 5 by default, but can be changed by the user.
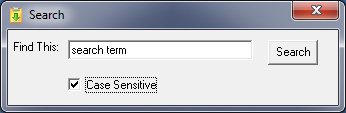
Search
Display Search dialog, from which a list of all history items containing a
search string can be displayed.
Reload
Following a Search, use this toolbar button to display all history items.
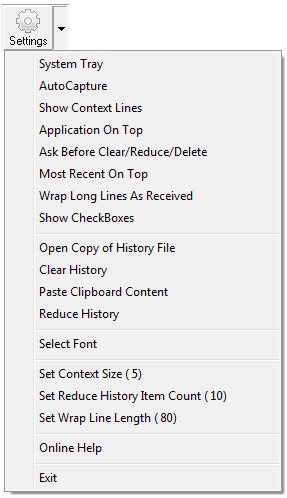
Settings
Pressing the Settings button will switch the display between showing
the most recent history items on top, or on bottom, of the display. The
dropdown arrow to the right of the Setting button is discussed in the
next section.
Help
Display this online help page in the user's default browser client.
System Tray
When checked, places gbClipper in the system tray. When unchecked,
gbClipper will be restored.
AutoCapture
Enables gbClipper to automatically monitor clipboard activity.
Show Context Lines
Shows the first few lines of the history item. The number of
lines shown is 5 by default, but can be changed by the user.
Application On Top
Maintains the gbClipper window above all other applications.
Ask Before Clear/Reduce/Delete
Ask the user for permission to remove items from the list.
Most Recent On Top
In the history file, the most recent clipboard entry is at the bottom
of the file. However, the user can view the history items in forward
or reverse order.
Wrap Long Lines As Received
Some sources, such as web pages, will return a single long line of
text (no end-of-line formatting). This option directs gbClipper
to split incoming text into multiple lines containing a maximum
number of characters. The split is made on word boundaries. The
default of 80 characters can be changed by the user.
Show CheckBoxes
Shows checkboxes on the displayed lines. When displayed, checkboxes affect
what history items will be affected by the Copy and Delete commands.
Open Copy of History File
Creates a copy of the history file, then opens the copy. gbClipper continues working
in the background.
Clear History
Removes all entries from the history file.
Paste Clipboard Content
Adds the current clipboard content to the history file.
Reduce History
Removes all but the most recent 10 entries from the history file.
Select Font
Allows user to select font used to display the history list.
Set Context Size
Determines the number of lines, for each history item, that will be
displayed in the history list.
Set Reduce History Item Count
Sets the number of history items that will remain after executing the
Reduce History List option.
Set Wrap Line Length
Sets the number of characters that will be used to wrap imcoming text
when the Wrap feature is enabled. Regardless of the number used, lines
will wrap on word boundaries.
Online Help
Display this online help page in the user's default browser client.
Exit
Closes gbClipper.
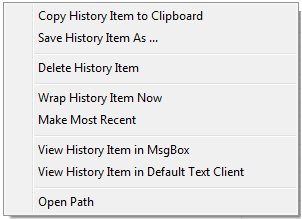
Copy History Item to Clipboard
Copies selected history item to the clipboard.
Save History Item As ...
Saves selected history item to user-specified file.
Delete History Item
Deletes that history item permanently.
Wrap History Item Now
Allows the user to wrap items that were retrieved when the automatic
wrap setting was not on.
Make Most Recent
Places the histor item in the most recent position, which is at the top
or bottom of the list depending on Most Recent on Top setting.
View History Item in MsgBox
The selected history item is displayed in a poup message box.
View History Item in Default Text Client
The selected history item is saved to a temporary text file, the opened
in the user's default text client.
Open Path
Opens history items which contain only a URL or path name.
To return to the full history item display, press the Reload toolbar button.
INI File
gbClipper application settings are saved in an INI file, kept in the same folder as the gbClipper application.
Comments and suggestions are welcome!